When Windows XP installed in an old desktop compute is set to run in IDE mode,
the computer cannot drive an SATA drive in AHCI mode directly because the
install harddisk driver should be updated to AHCI.
For most new motherboards, the SATA port can be configured as either IDE or
AHCI. Therefore a SATA drive can also be connected to Windows XP running in IDE
mode.
-
Power on the system.
-
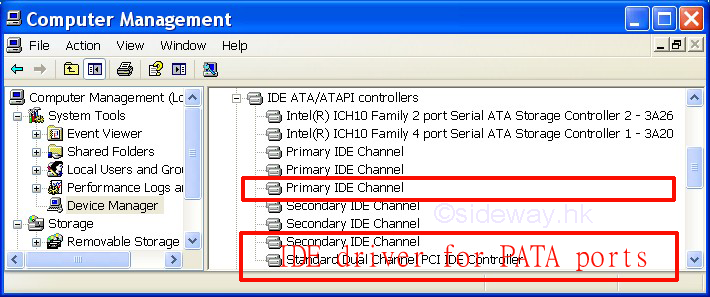
Update the driver for IDE ATA/ATAPI controllers to Standard Dual channel PCI IDE
Controller before moving the old IDE drive to a new motherboard.
Update the driver to Standard Dual channel PCI IDE Controller if necessary.
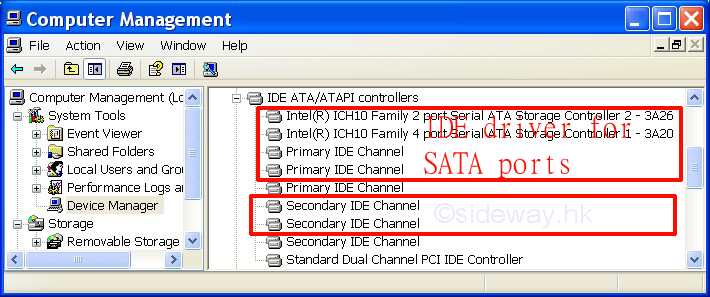
Control Panel→Adminstrative Tools→Computer Management→Device Management→IDE
ATA/ATAPI controllers→select the correct IDE/ATA dervice.
-
Shut down and power off the system.
-
Connect a SATA drive to the mother board.
-
Power on and start up the computer
-
BIOS preparation for using Clonezilla Live for USB flash drive or USB hard drive
-
Config the storage configuration of the mother board in BIOS setup for SATA port
as IDE such that the Windows XP with IDE driver can identify the SATA drive.
Press "Delete" button to enter BIOS SETUP UTILITY. Switch to Storage
Configuration→SATA Configuration→Configure SATA as [IDE]
-
Config the booting harddrive of the mother board in BIOS setup for using the
Clonezilla Live drive instead of booting up the Windows XP system drive.
-
→Save the change and exit BIOS SETUP UTILITY
-
Clone the IDE drive to the SATA drive.
Use Clonezilla Live for USB flash drive or USB hard drive from
http://clonezilla.org/clonezilla-live.php to clone the IDE drive to a SATA
drive. last updated
02Apr2016
Allow the motherboard to load continuously to enter the Clonezilla Live system
Use beginner or default mode to clone the IDE drive to SATA drive together with
boot loader.
power off the system after completed
-
Shut down and power off the system.
-
Remove
unnecessary drives from the computerr
Remove Clonezilla Live USB flash drive or USB hard drive.
Remove Windows XP IDE drive.
Keep the SATA drive with cloned Windows XP system and other necessary drives.
-
Power on and start up the computer
-
BIOS preparation for using SATA drive with cloned Windows XP system and IDE
driver
Config the booting harddrive of the mother board in BIOS setup for using the
Windows XP SATA drive
Make sure→SATA Configuration→Configure SATA as [IDE] such the the Windows XP
with IDE driver on the SATA drive can be identified and boot up normally.
→Save the change and exit BIOS SETUP UTILITY
Allow the motherboard to load continuously to enter the Windows XP system in the
cloned SATA drive.
-
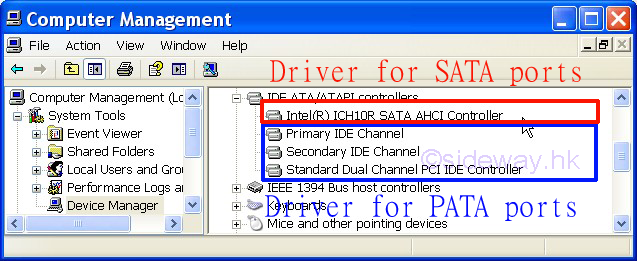
Upate the drivers for SATA controllers of IDE ATA/ATAPI controllers to SATA AHCI Controllers.
Besides using AHCI driver provide with motherboard, AHCI driver for some
motherboards with Intel chipsets can also be download from
https://downloadcenter.intel.com/download/18668/AHCI-F6-Floppy-Disk-Utility-for-AHCI
last updated 02Apr2016
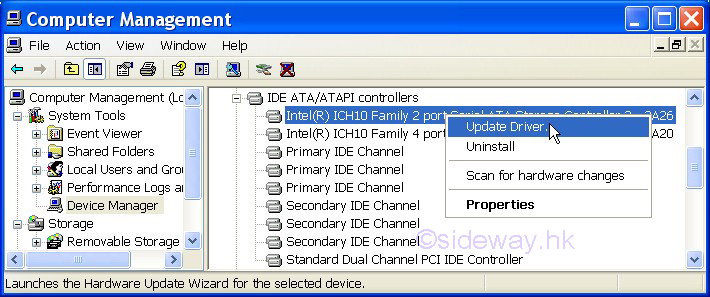
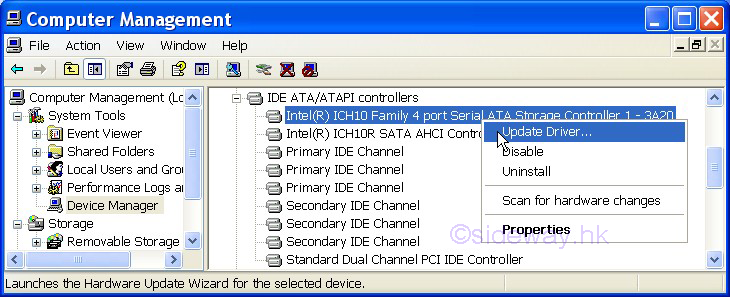
Control Panel→Adminstrative Tools→Computer Management→Device Management→IDE
ATA/ATAPI controllers→select the correct IDE driver of SATA drives.
Update all IDE drivers for SATA drives to Intel SATA AHCI Controller.
-
Update the 2 port controller
to which the SATA drive with cloned Windows XP is connected. Try other ports
when blue screen occurs.
-
Install driver from a specific location.
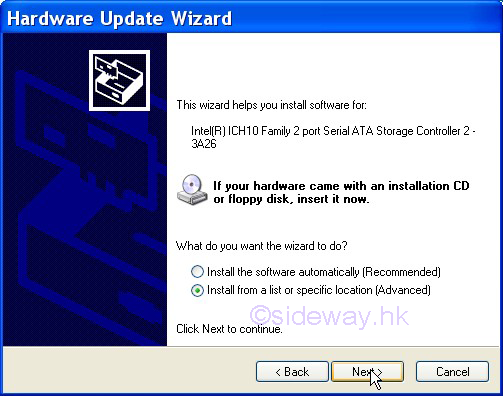
-
Choose a driver from a specific location.
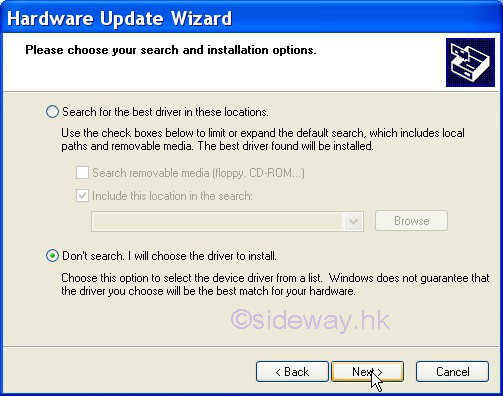
-
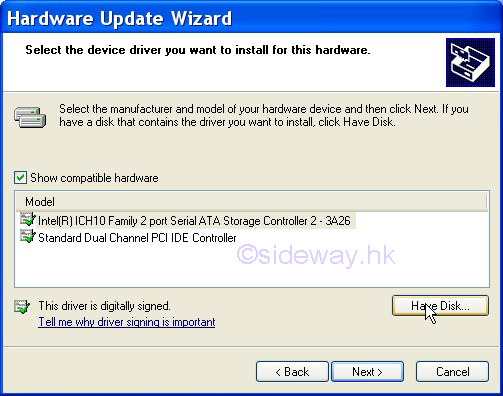
Use
the driver from a specific location.
-
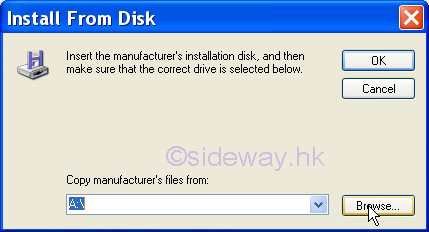
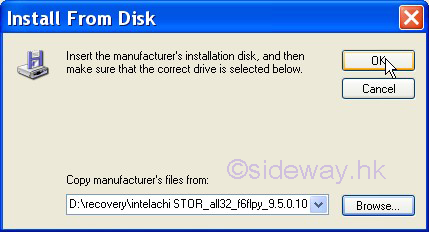
Browse
the driver from a specific location.
-
Verify the INF files in the specific location.
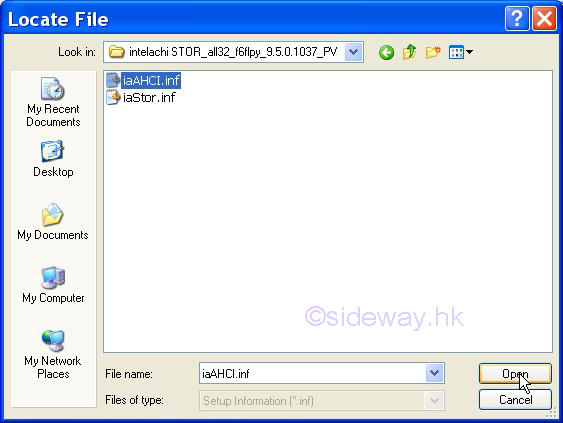
-
Confirm to install
the AHCI driver from the specific location.
-
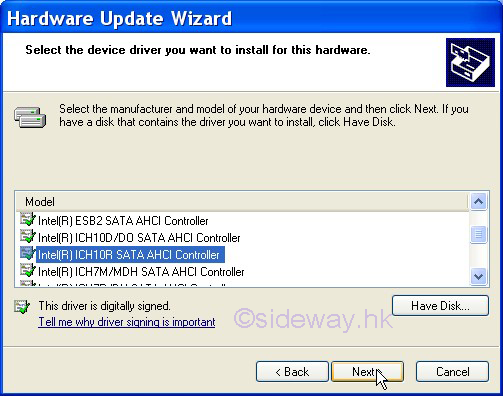
Select the the correct AHCI driver from the specific location.
-
Confirm to continue installing the driver.

-
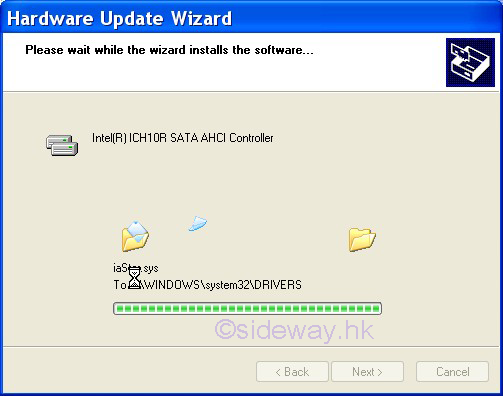
Wait to complete the installation of the driver.
-
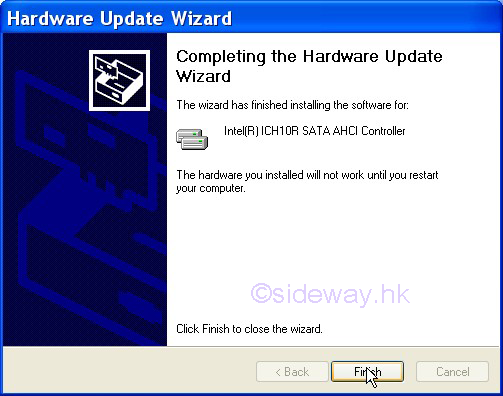
Complete the installation of the driver.
-
Answer "No" to verify the installed driver.
-
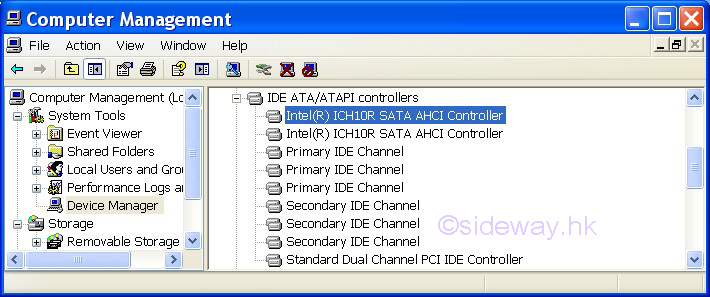
Verify the installed driver is SATA AHCI Controller.

-
Update the
4 port controller.
-
Repeat steps 2 to 12
-
Verify the installed driver is
also SATA AHCI Controller.
-
Shut down the system again.
-
Start up the computer again.
-
BIOS preparation for using SATA drive with cloned Windows XP system and AHCI
driver
Config the storage configuration of the mother board in BIOS setup to ACHI such
that the Windows XP with ACHI driver can boot up the system.
Allow Windows XP to load continuously
-
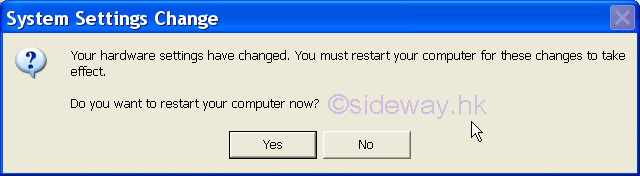
Answer "Yes" to
restart the computer for completing the new driver installation to take effect.

-
Make Sure Windows XP loaded normally
-
Check the installed drivers.
-
Shut down the system for Windows XP to use any newly installed hardwares in
next start up.
-
Power off the system.


 Nu Html Checker
  na
na